A firestop inspection can fall apart over something small: a missing annular-space measurement, a photo taken too far away, or a listed system that was never checked against the actual wall and penetrating item. The best firestop inspection tools help you see the condition, verify the assembly, capture proof, and communicate corrections before closeout turns into a guessing game.
This is not about carrying the biggest bag of gadgets. Firestop work is system-specific. The right tool set helps an inspector compare installed conditions with the listed system, manufacturer instructions, approved documents, and the requirements that apply to the project. It also has to work in a crowded ceiling space, a dark riser room, or a basement with no signal.
What a Firestop Tool Must Help You Verify
A listed firestop system is more than a bead of sealant around a pipe. The inspection may need to confirm the rated assembly, the penetrant type and size, the opening size, the annular space, backing material, sealant depth, insulation details, and the condition of the finished installation. A joint system brings a different set of variables, including joint width, movement capability, substrate condition, and installed depth.
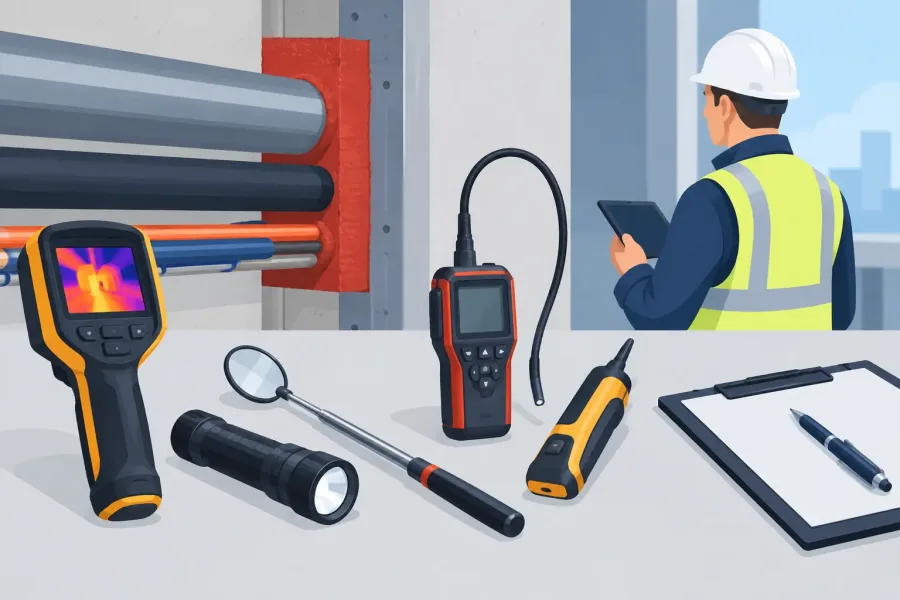
That is why one “firestop inspector tool” does not exist. A good kit supports four jobs: seeing the installation clearly, measuring what matters, finding the applicable system information, and creating records that another person can understand later.
For through-penetration firestop systems, inspection requirements are commonly tied to ASTM E2174. Joint systems are commonly tied to ASTM E2393. The adopted building code, contract documents, special-inspection program, and authority having jurisdiction can add project-specific requirements. Use those documents to define the inspection scope before deciding what belongs in the field kit.
The Best Firestop Inspection Tools for Real Field Work
1. A high-output flashlight and inspection mirror
Darkness hides bad work. A compact, high-output flashlight is the first tool most inspectors reach for because it reveals gaps, voids, incomplete sealant, damaged material, and unsealed areas behind crowded services. Choose a light with a focused beam and a low setting for close-up work. A magnetic base can be helpful when both hands are needed, but it is not essential.
Pair it with an inspection mirror for areas above conduit banks, behind pipes, or around sleeves near deck flutes. The mirror is inexpensive, does not need a battery, and often answers the question faster than removing adjacent finishes. It is also a good reminder that access is part of inspection planning. If a condition cannot be seen well enough to evaluate, it is not ready to be accepted.
2. A flexible borescope for concealed conditions
A borescope earns its place when direct line of sight is impossible. It can help examine firestop at congested penetrations, within shaft-wall openings, or behind obstructions without unnecessary demolition. Models with adjustable lighting and a reasonably stiff cable are easier to control than very thin, floppy cameras.
The trade-off is perspective. A borescope image can make a small gap look large or hide a depth problem completely. Use it to document visual conditions, not to guess dimensions. If the listing requires a specific sealant depth or a maximum annular space, verify that requirement with a measurement tool or request access that permits a proper inspection.
3. Steel rules, depth gauges, and calipers
Measurements turn an opinion into an inspection finding. A six-inch steel rule is fast for small openings, exposed sealant widths, and visible installation dimensions. A longer tape measure is useful for larger sleeves, cable openings, and joint conditions. Keep both readable and clean enough that the graduations show in photos.
A depth gauge is particularly useful when a system calls for a stated fill depth, sealant depth, or packing depth. Digital calipers can help with pipe outside diameter, cable bundle dimensions, or small opening measurements where a tape is too blunt. They are not mandatory for every walkthrough, but they are valuable when the listing gives tight ranges.
Measure only where doing so will not damage the installation. Fresh sealant, intumescent materials, and finished surfaces can be altered by a careless probe. When dimensions cannot be safely verified after installation, document the limitation and follow the project process for resolving it.
4. A camera or tablet with a disciplined photo process
The best inspection photos answer three questions: where is this, what system or condition is shown, and what dimension or issue matters? A capable phone or tablet camera is usually enough, provided the operator follows a repeatable process.
Take one wide photo for location, one medium photo showing the entire penetration or joint, and one close photo for the critical detail. Include a rule, label, or other scale reference when dimensions matter. Photograph system labels where provided, but do not treat a label as proof that the work behind it matches the system.
A tablet can be better than a phone for reviewing documents and marking up plans, while a phone is usually better in tight spaces. The right choice depends on the building and the inspector's workflow. Either way, protect the device, carry spare power, and keep key records available offline.
5. Offline access to listed systems and project documents
This is the tool that prevents confident mistakes. Before accepting a penetration, the inspector needs the applicable firestop system details, including the construction type, rating, penetrant, opening limits, fill materials, and installation requirements. Manufacturer system sheets, approved submittals, drawings, and relevant specifications should be organized so they can be found quickly on site.
Offline access matters because mechanical rooms, garages, below-grade spaces, and active construction sites are not dependable places to rely on a browser. Download the approved documents to a managed device and use a clear folder structure or searchable document system. Confirm that the version in hand matches the approved submittal set.
Do not substitute a similar-looking system for the specified one. A pipe material, wall type, insulation condition, or annular-space range can change the system entirely. The closest match is not automatically an acceptable match.
6. Markup and reporting software that works without a signal
Good reporting tools reduce rework because they make deficiencies specific. A useful field app or form should let you attach photos, identify the room or grid location, note the system reference, record the observed condition, assign responsibility, and track the correction to closure.
Avoid forms that force the inspector into vague language such as “repair firestop.” Better wording identifies the issue: “At Room 214 east wall, two-inch steel pipe penetration has visible unsealed annular space at the 4 o'clock position. Verify and install an approved listed system for the rated wall assembly.” The correction method still belongs to the responsible installer and approved system, but the finding is clear.
Offline-first reporting is a practical advantage here. Notes and photos can be captured underground or in a remote building, then exported when connectivity returns. The goal is not more paperwork. It is a record that can be reviewed without relying on memory.
7. Labels, markers, and basic access tools
The final group is simple but useful: a permanent marker, painter's tape or removable tags, a clipboard or rigid writing surface, and basic tools approved for the site. These support location marking, temporary identification, and clear communication during a walkthrough.
Use temporary markings carefully. Do not cover labels, damage finished surfaces, or create confusion about acceptance status. A marked location should always match the photo log and report. If the project has a color-coding or deficiency-tag process, follow it consistently rather than creating a personal system nobody else understands.
Build the Kit Around the Inspection Sequence
The most efficient inspectors do not start by measuring every opening. They start by confirming location and assembly, then identify the penetrant or joint condition, pull up the applicable documentation, inspect visually, and measure the details that control compliance. Photos and notes are captured while the condition is open and accessible, not reconstructed at the end of the day.
A practical daily kit can be built around seven items:
- High-output flashlight and inspection mirror
- Flexible borescope with adjustable light
- Steel rule, tape measure, depth gauge, and calipers as needed
- Camera-equipped phone or tablet with backup power
- Offline listed-system documents and approved submittals
- Offline-capable reporting or markup tool
- Marker, removable tags, and site-approved access tools
Not every project needs every item at every location. A new hospital with dense MEP coordination may justify a borescope and detailed digital reporting on every round. A straightforward tenant build-out may rely more heavily on a flashlight, rule, photos, and quick access to the correct system sheets. The kit should scale with risk, access, and documentation requirements.
Tools Do Not Replace System Knowledge
A bright light cannot tell you whether the listed system permits that cable bundle. A depth gauge cannot establish that the wall has the required rating. Reporting software cannot correct a deficient installation. These tools make the inspector faster and the record stronger, but only when they are used alongside current system information and a clear inspection scope.
Be especially careful with conditions that look routine: mixed penetrations, insulated piping, plastic pipe, cable trays, oversized sleeves, deck penetrations, and movement joints. Those conditions often have details that are easy to miss and difficult to fix after finishes are complete.
The best field kit is the one that helps you make a defensible decision while the work is still accessible. Bring light, measurement, documentation, and a reliable way to record what you found. Then let the listed system, not a guess, decide whether the installation is ready to close.